Contenido relacionado
Revisiones y protocolos relacionados
George J Bugg, Farah Siddiqui, Jim G Thornton | 23 junio 2013
William R Parry Smith, Argyro Papadopoulou, Eleanor Thomas, Aurelio Tobias, Malcolm J Price, Shireen Meher, Zarko Alfirevic, Andrew D Weeks, G Justus Hofmeyr, Ahmet Metin Gülmezoglu, Mariana Widmer, Olufemi T Oladapo, Joshua P Vogel, Fernando Althabe, Arri Coomarasamy, Ioannis D Gallos | 24 noviembre 2020
Caron Kim, Sharmani Barnard, James P Neilson, Martha Hickey, Juan C Vazquez, Lixia Dou | 31 enero 2017
Philippa Middleton, Emily Shepherd, Vicki Flenady, Rosemary D McBain, Caroline A Crowther | 4 enero 2017
Robbie S Kerr, Nimisha Kumar, Myfanwy J Williams, Anna Cuthbert, Nasreen Aflaifel, David M Haas, Andrew D Weeks | 22 junio 2021
Ioannis D Gallos, Argyro Papadopoulou, Rebecca Man, Nikolaos Athanasopoulos, Aurelio Tobias, Malcolm J Price, Myfanwy J Williams, Virginia Diaz, Julia Pasquale, Monica Chamillard, Mariana Widmer, Özge Tunçalp, G Justus Hofmeyr, Fernando Althabe, Ahmet Metin Gülmezoglu, Joshua P Vogel, Olufemi T Oladapo, Arri Coomarasamy | 19 diciembre 2018
Zarko Alfirevic, Nasreen Aflaifel, Andrew Weeks | 13 junio 2014
Shuqin Wei, Bi Lan Wo, Hui‐Ping Qi, Hairong Xu, Zhong‐Cheng Luo, Chantal Roy, William D Fraser | 7 agosto 2013
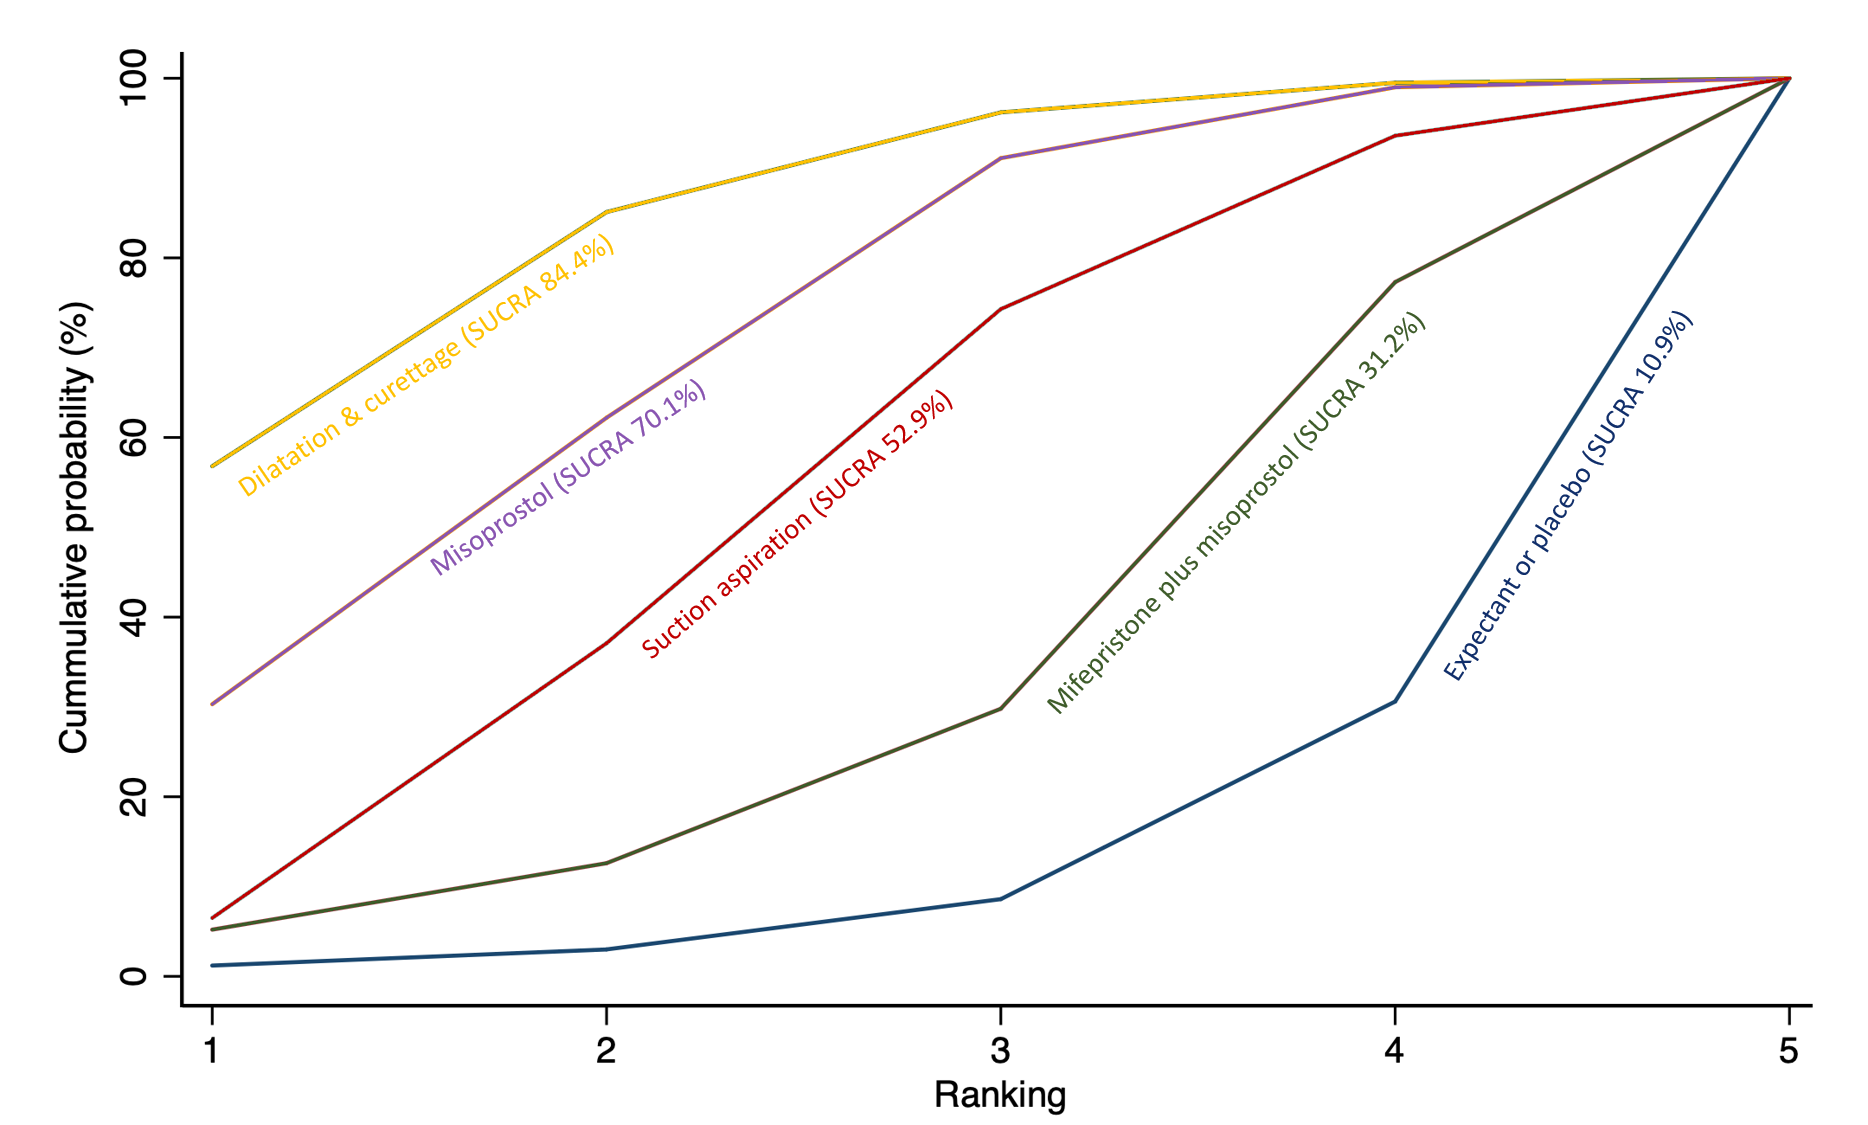
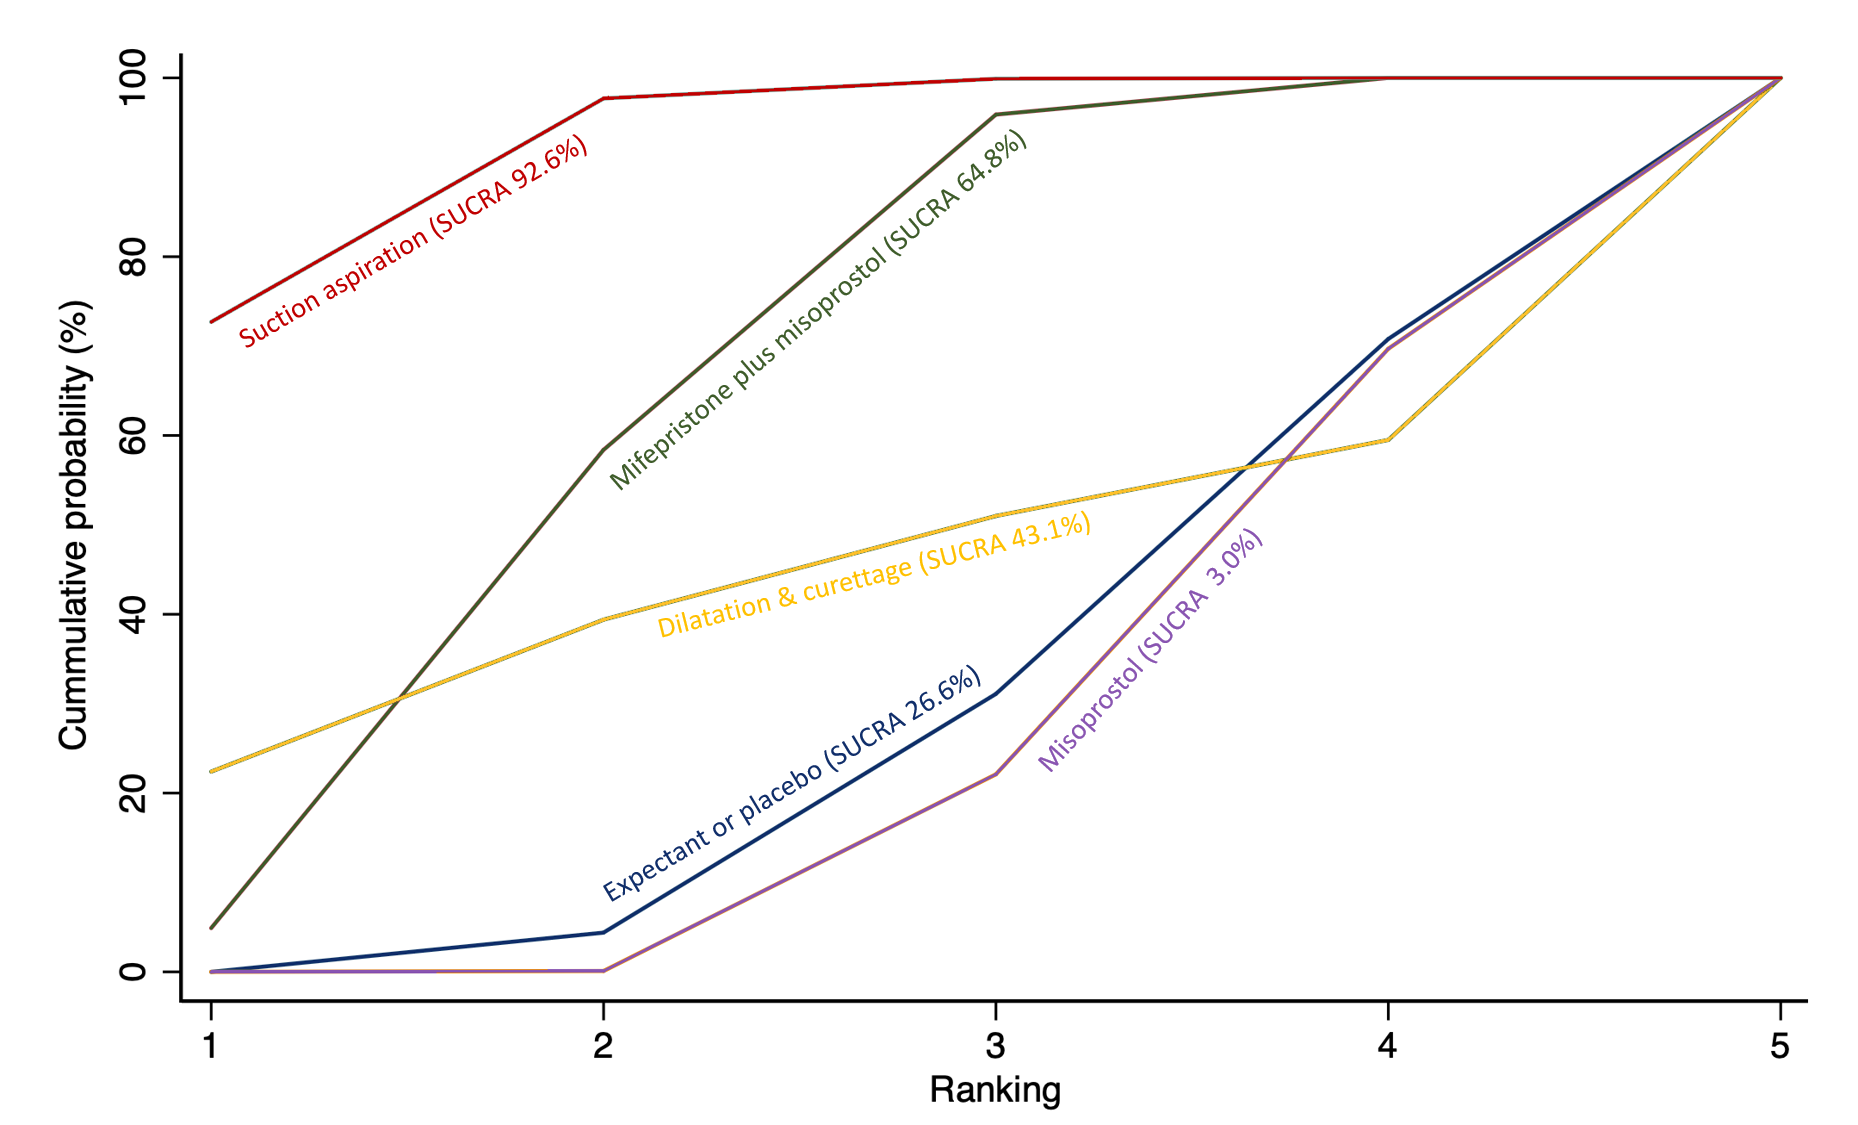
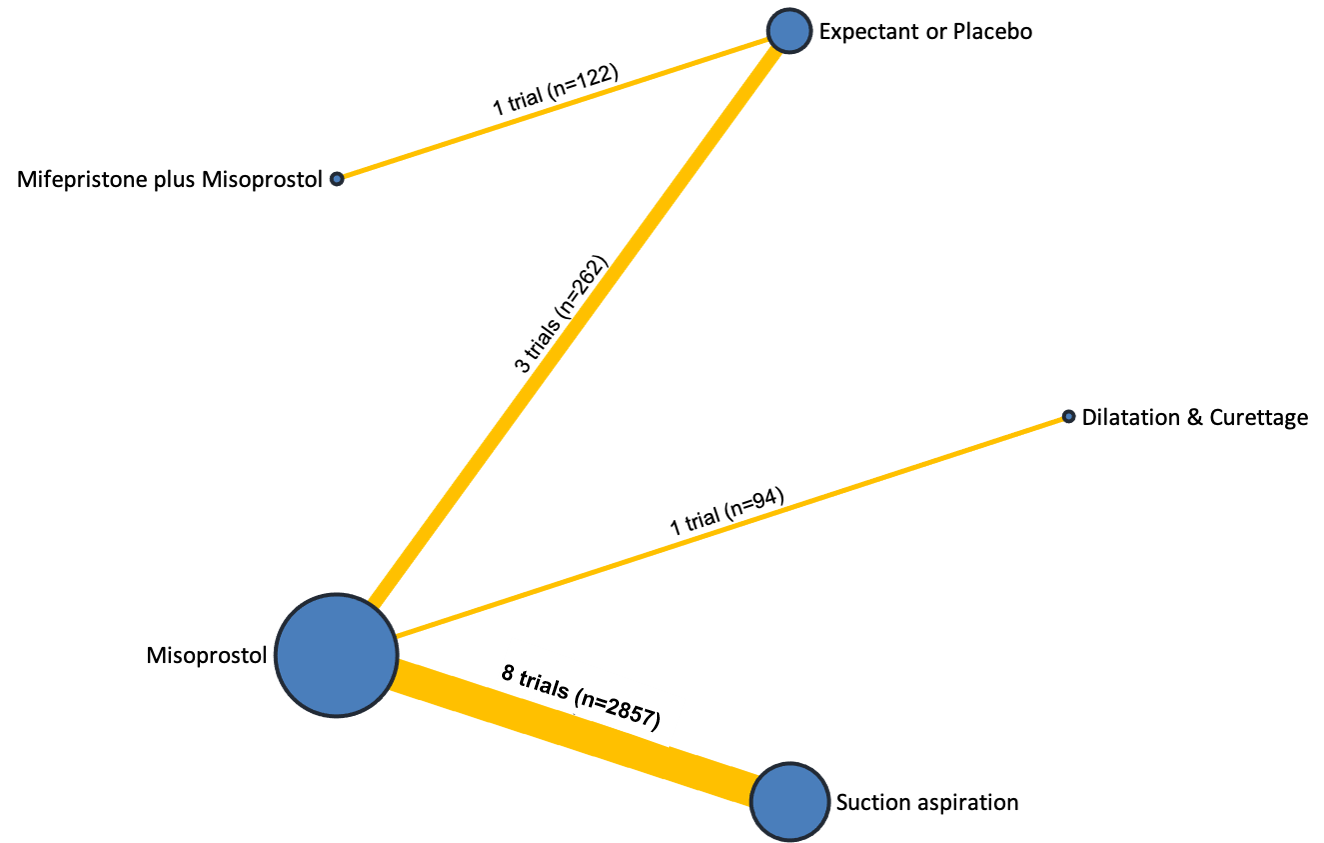
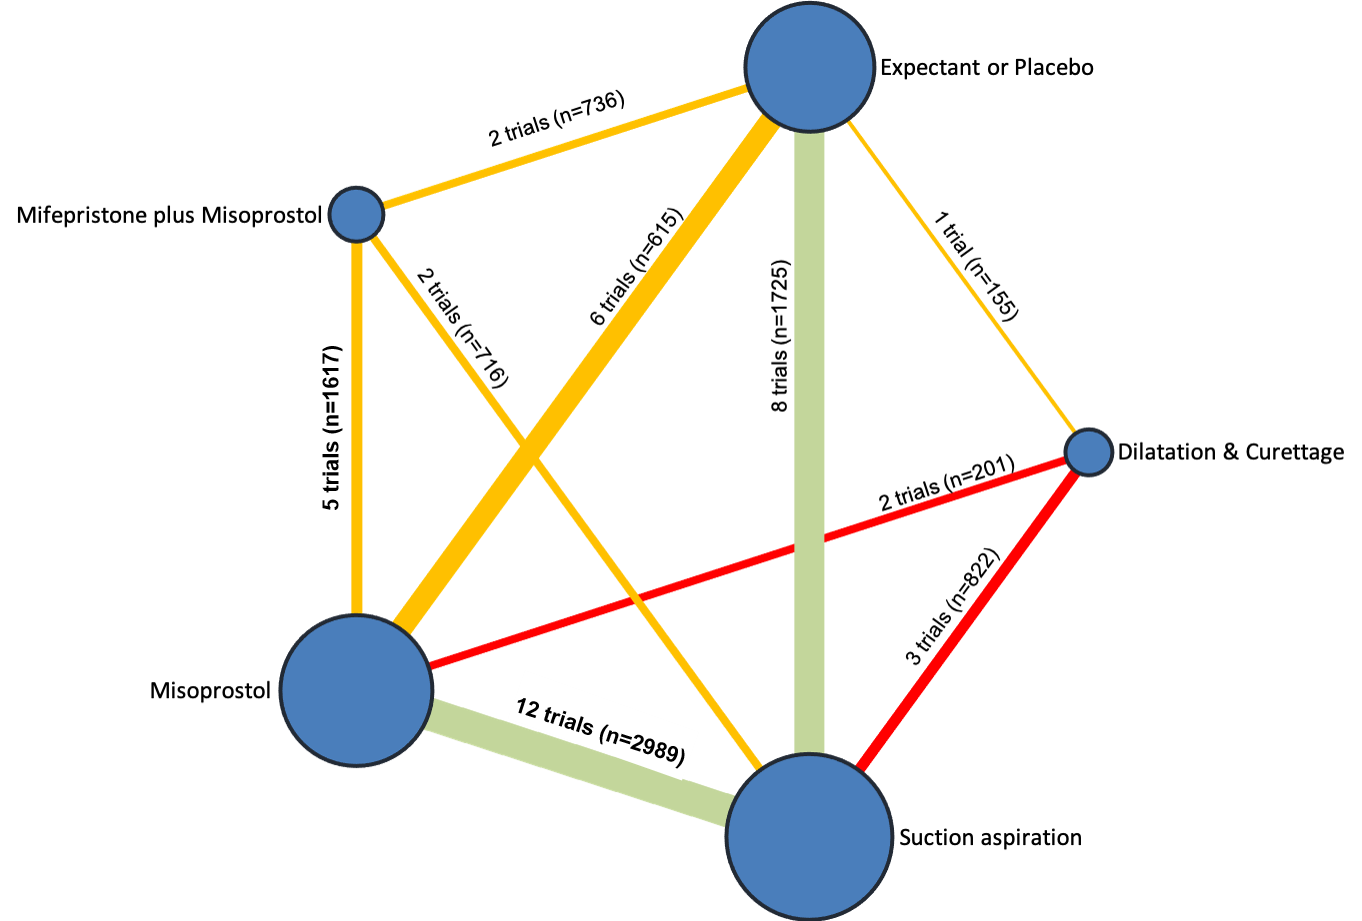
Adam J Devall, Argyro Papadopoulou, Marcelina Podesek, David M Haas, Malcolm J Price, Arri Coomarasamy, Ioannis D Gallos | 19 abril 2021
Kylie Webber, Rosalie M Grivell | 10 noviembre 2015
Respuestas clínicas Cochrane
Jane Burch, Juliana Ester Martin | 26 julio 2021